


Veined Wafer Paper Rose Leaves
Working with Wafer Paper just grabbed me since I took lessons in a work shop by Stevi Auble who taught a beautiful open rose. But I was not totally happy with the leaves, so I started an attempt to give them a more natural appearance by veining them and I am very excited about the results!
I found out how to do this in the internet at "A Cake to Remember"( http://acaketorememberva.blogspot.com.au/2014/01/how-to-make-wafer-paper-flower-petals.html) and at Amelia Carbines video
tutorial (https://www.youtube.com/watch?v=sCJWJp5xcY8). I have changed both methods a little bit and want to describe for you how I did it:
Material:
Wafer Paper (0.4 mm thick)
Vodka
Paste color 'Gooseberry' (Sugar Flair)
Paper covered wire
Floral tape
Petal dust for the stem
Water
Tools:
Scissors
Silicone Rose Leaf Veiner
Flat soft paint brush
Water boiler to make steam
How I made it:
1
First cut out the wafer paper leaves using scissors and cut the jagged edges. Cutting the edges after the veining is more difficult, because the paper will be quite hard.
2
Now color the vodka with some paste color. Place the leaf on the veiner and soak the paper using the brush with the colored vodka. The paper is now soft and clings to the veiner. Start in the middle of the veiner to avoid air bubbles.
3
Very carefully press the soft paper in the structure of the Veiner with the brush. This was the hardest part. In the first photo you can see a fresh soaked leaf on the veiner.
4
Then you have to to wait, until the paper is dried and loosens itself from the veiner (photo below). You can speed it up with a heating lamp, a hair dryer(be careful that it does not fly away) or warm sunlight. A dehydrator would also work fine but it dries pretty quickly even in the air.

5
When the paper is dry you can wire it. For this you can make a sticky liquid from remnants of the Wafer Paper, which are dissolved in water. (Tip from Amelia Carbine ) Brush it on the wire, press the wire on the leaf and press them both firmly together with your thumb and index finger until they stick together.
You can also additionally press a small piece of wafer paper on the wire and cover it.
6
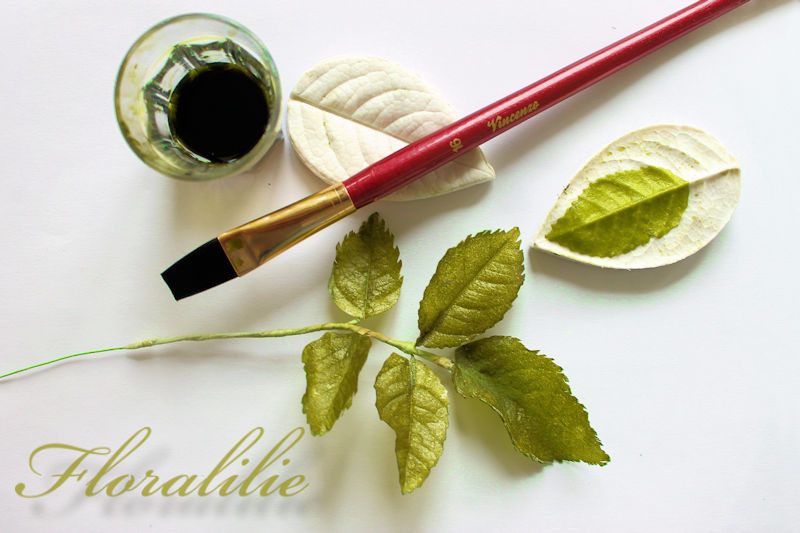
When everything is dry and tight you can color the leaves further with petal dust (this will give a mat finish to it) or with in alcohol dissolved paste colors or you airbrush them with food color.
7
If you want to give the leaves a different movement, you can hold them for a fraction of a second over steam. The leaves will be again flexible for a second. But be very careful! When you hold them too long into the steam you will have mush.
8
Now tape the leaves together with florist tape and your rose leaf is finished!
I really like this material for several reasons. For one thing it is not fragile, it is very easy to shape and it looks very natural. Also the natural shine on the surface is very well suited for leaves. In addition, the paper is also quite cheap to maintain and very durable. You can work very well in stock.
A small drawback, however, is the time needed for the drying process on the veiner. In the links above you will find some methods to make more veiners.
Many thanks to my lovely friend Felien from Decor 'N Dessert Diva who helped me with the translation!
♥♥♥
https://www.facebook.com/pages/Decor-N-Dessert-Diva/1481121088785319?fref=ts